
Guymager Forensic Imaging Use Case on The Acorn
Application Type: GUI-based Forensic Imaging Tool
Primary Use: Creating verified forensic disk images (E01/RAW)
Pre-installed in The Acorn’s Forensics Hub
Context
A Digital Forensic Examiner is investigating a financial fraud case. They receive a suspect drive containing sensitive financial data. Their goal: create a forensically sound image of the drive while preserving evidence integrity.
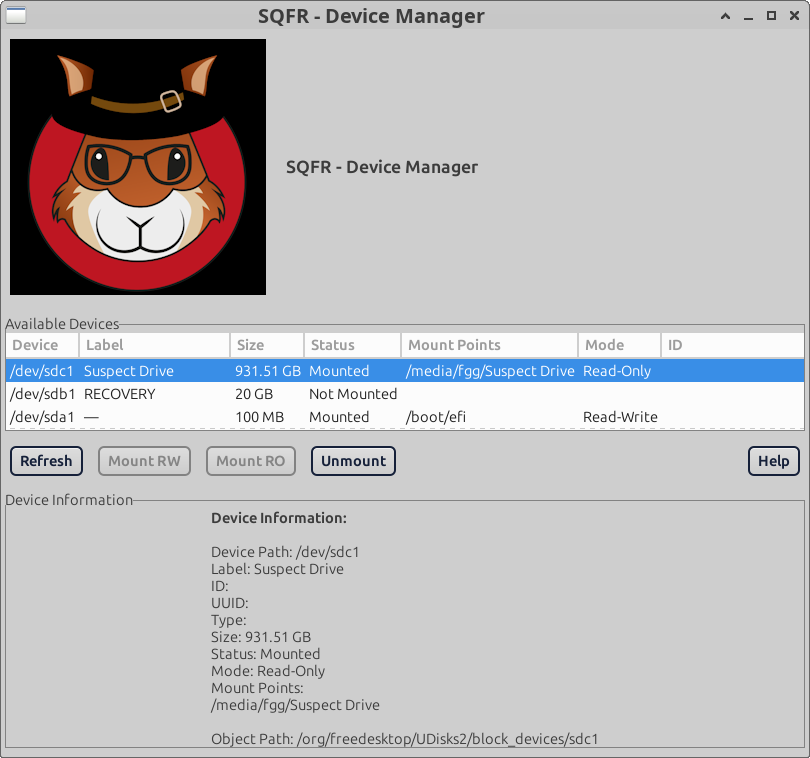
1. Connecting the Suspect Drive
• The examiner connects the drive using USB or SATA–USB.
• The examiner launches Device Manager/Write-Blocker from the Forensics Hub to manage device access modes.
• Once the Device Manager is loaded, all connected devices are set to Read-Only mode by default. The examiner can switch devices between Read-Only and Read-Write modes within the Device Manager as needed.Screenshot: Write-Blocker/Devise Manager GUI
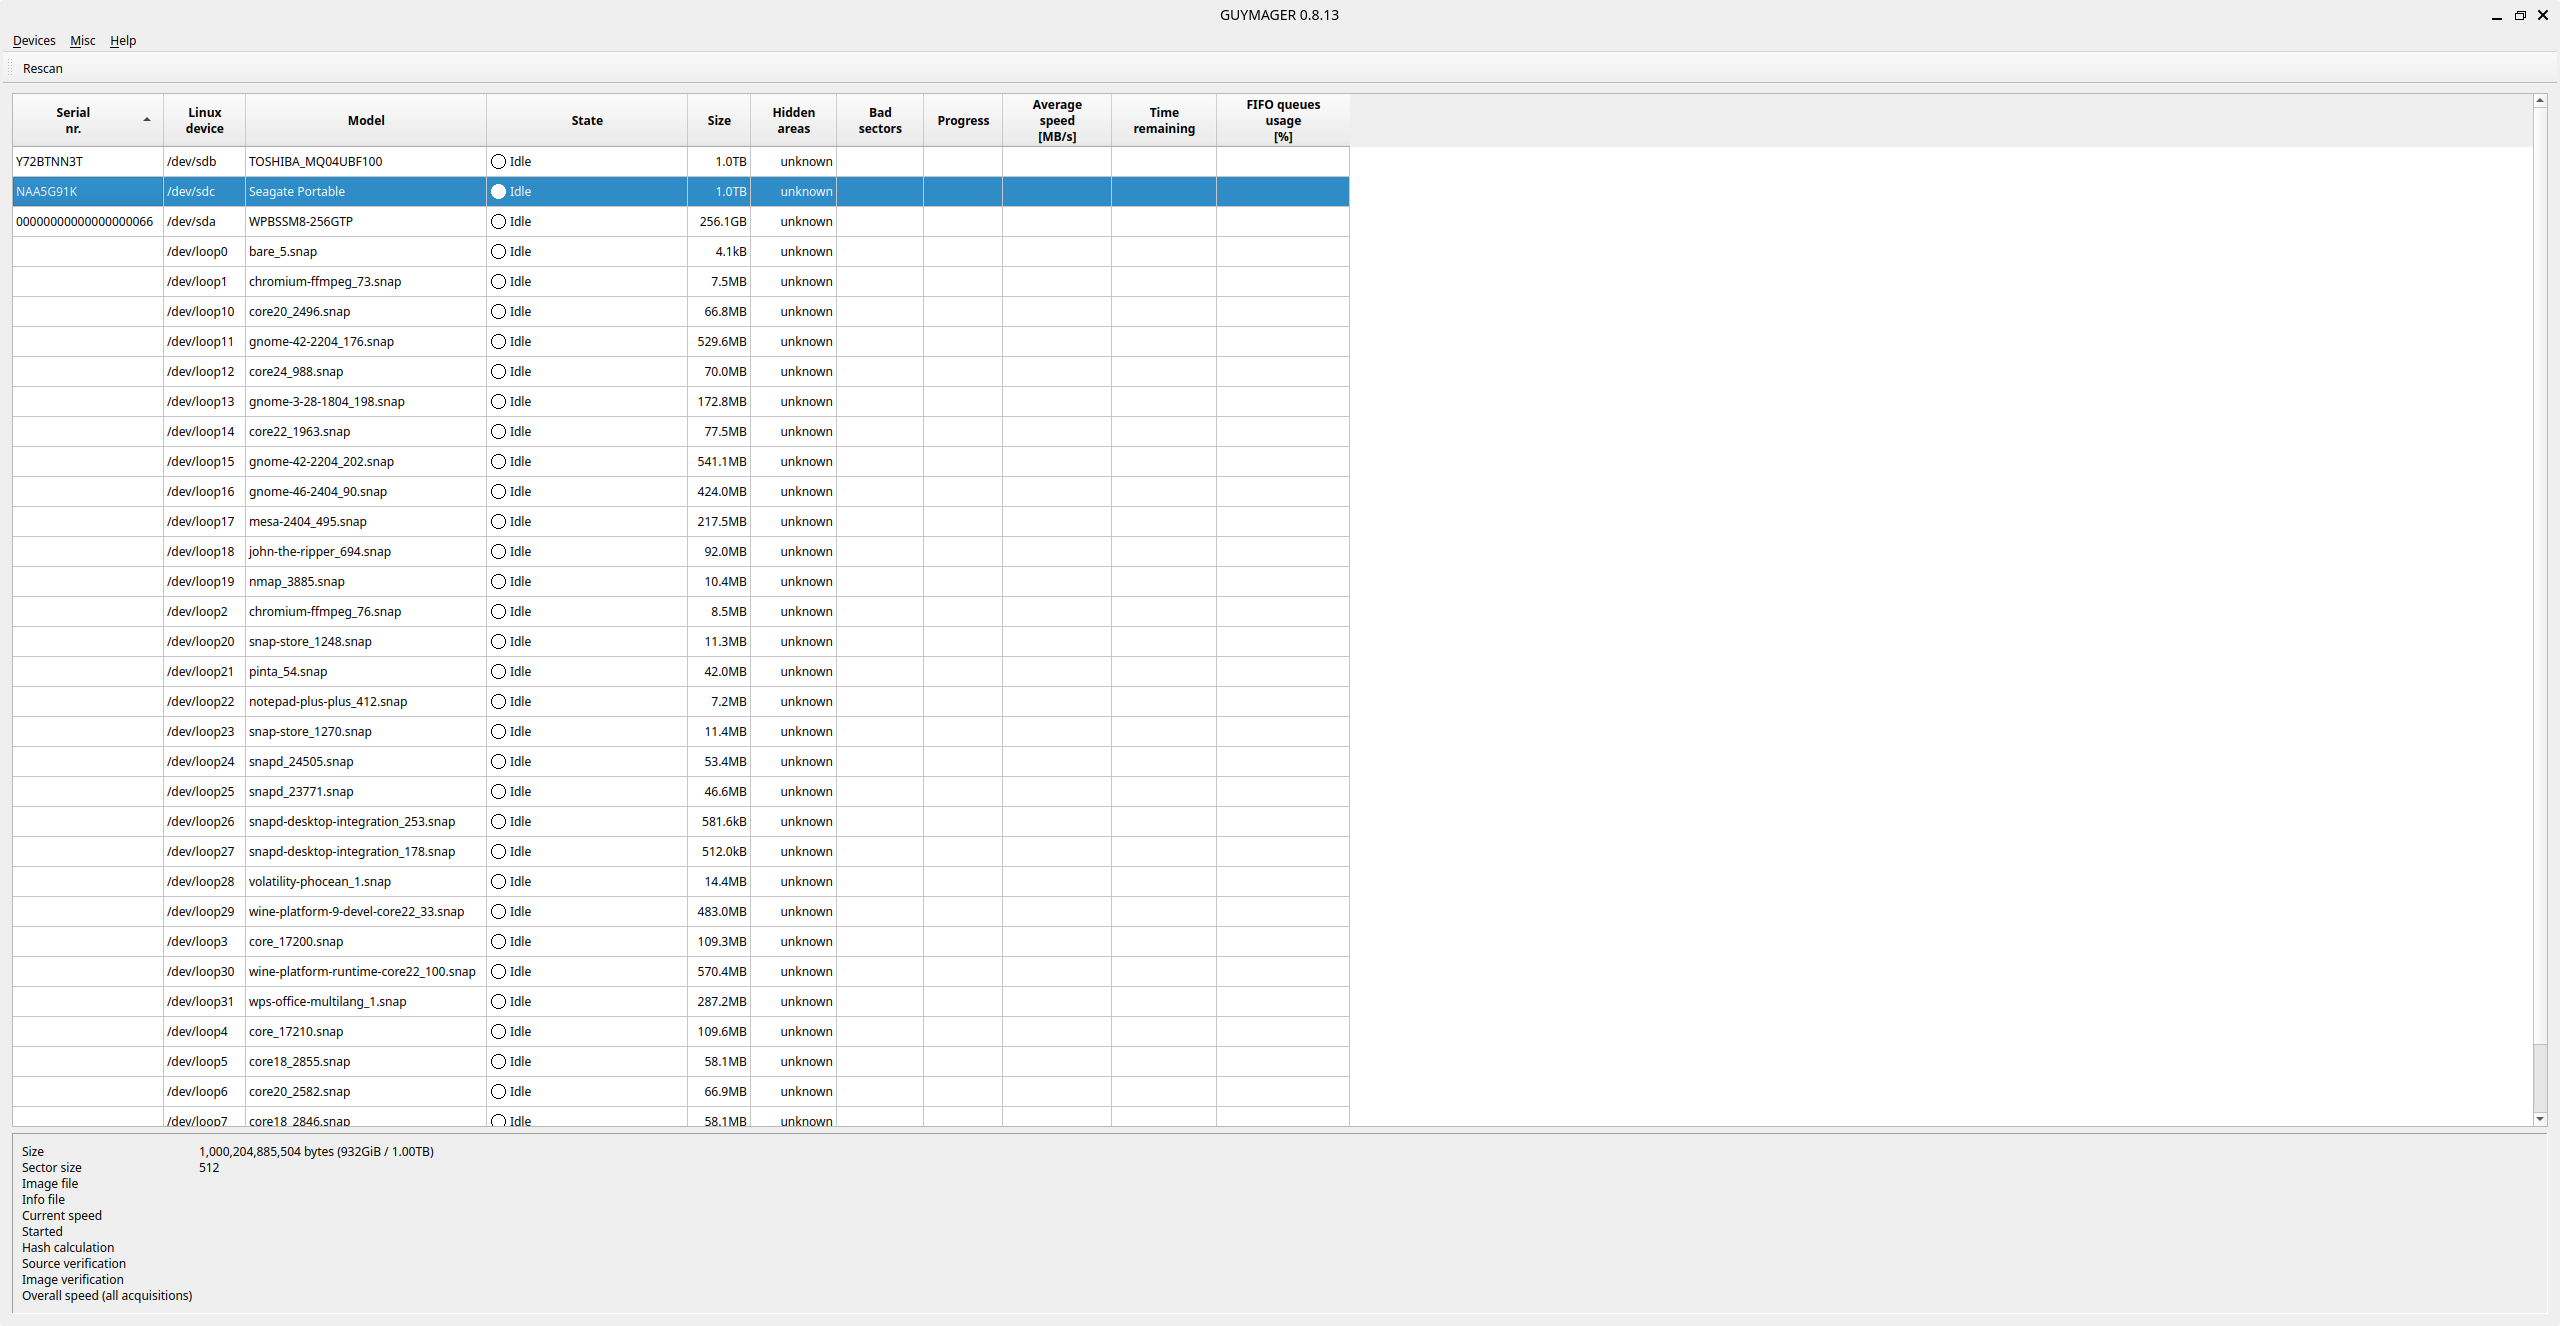
2. Launching Guymager & Detecting the Device
• The examiner opens Guymager from the Forensics Hub.
• Guymager lists available devices, showing:
– Device path (e.g., /dev/sdc)
– Model, serial number, capacity
– Partition layout
Screenshot: Device Detection in Guymager
3. Starting the Forensic Image Acquisition
• The examiner right-clicks on the device → Acquire Image.
• They select E01 format and enter:
– Investigator name
– Case ID / evidence number
– Destination folder (on external SSD or internal evidence partition)
They enable:
• MD5 & SHA1 hashing
• Concurrent imaging (optional)Screenshot: Forensic Imaging Setup in Guymager

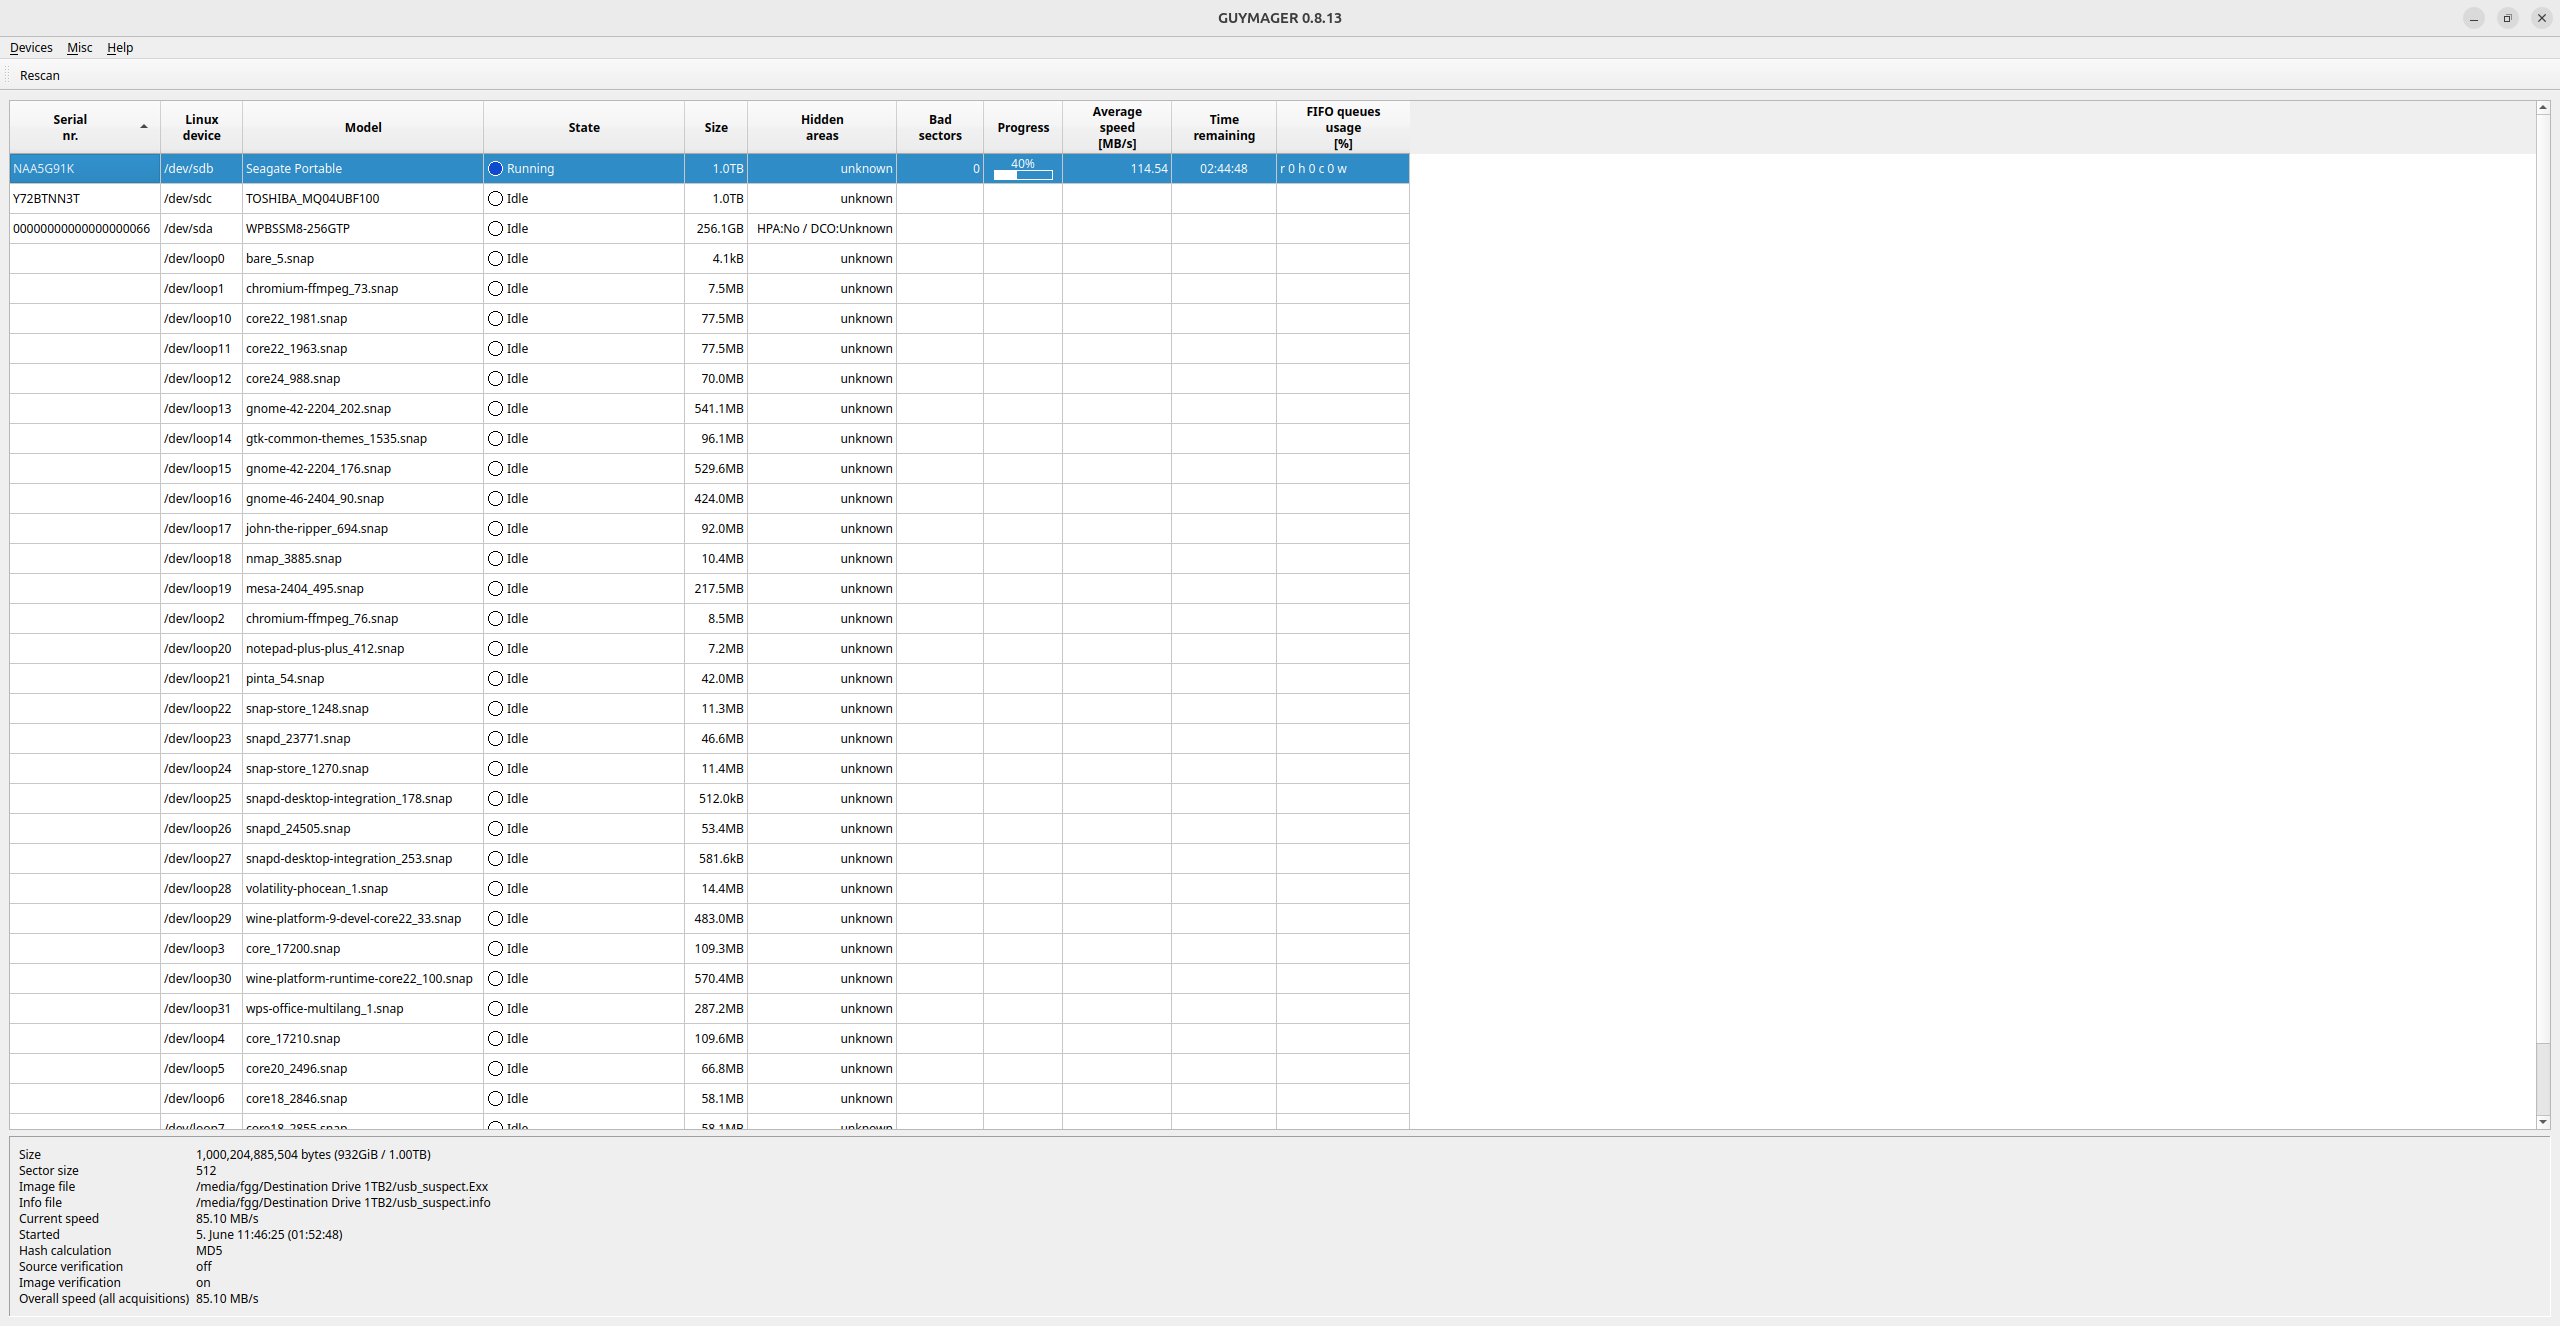
4. Monitoring the Imaging Process & Verification
• Guymager begins the imaging process, displaying:
– Real-time progress: data rate and estimated time remaining.
– Ongoing hash calculations: for both the source drive and the forensic image.
• Upon completion, the examiner compares the hash values generated for the original drive and the image.
• The hash values match, confirming the forensic image is an exact, unmodified replica of the suspect drive.
Screenshot: Live Imaging Progress in Guymager
Screenshot: Imaging Completed and Verified

5. Reporting & Documentation
Once the investigation is complete, it’s essential to present findings clearly and professionally. Whether for internal reports, clients, or legal proceedings.
Guymager automatically generates a forensic acquisition log, capturing:
Device details such as serial number, size, and partition information.
Imaging start and completion times.
Hash verification results.
The examiner compiles a preliminary forensic report using WPS Office, which comes pre-installed on The Acorn. WPS is fully compatible with Microsoft Office formats (DOCX, XLSX, PPTX), allowing reports, presentations, and spreadsheets to be created directly on The Acorn, eliminating the need to transfer files elsewhere.
The report includes:
Details of the imaging process.
Hash verification results confirming data integrity.
The examiner exports the report as a PDF for inclusion in the case documentation.

6. Preserving Integrity
- Throughout the process, The Acorn’s Devise Manager ensures no modifications are made to the suspect drive.
- After confirming a successful forensic image, the examiner unmounts and safely removes the suspect drive.
- The original drive is then secured in storage, and the verified forensic image is stored securely, ready for analysis.
Why Guymager + The Acorn Works
| Feature | Benefit |
|---|---|
| GUI-Based Imaging | Simple for examiners, no command-line needed |
| Built-in Hashing | Verifies evidence integrity (MD5/SHA1) |
| Concurrent Imaging | Save time on large volumes |
| Full Integration | Device Manager + Guymager + Reporting in one hub |
Learn more about Guymager