Resolve identity before opening a volume
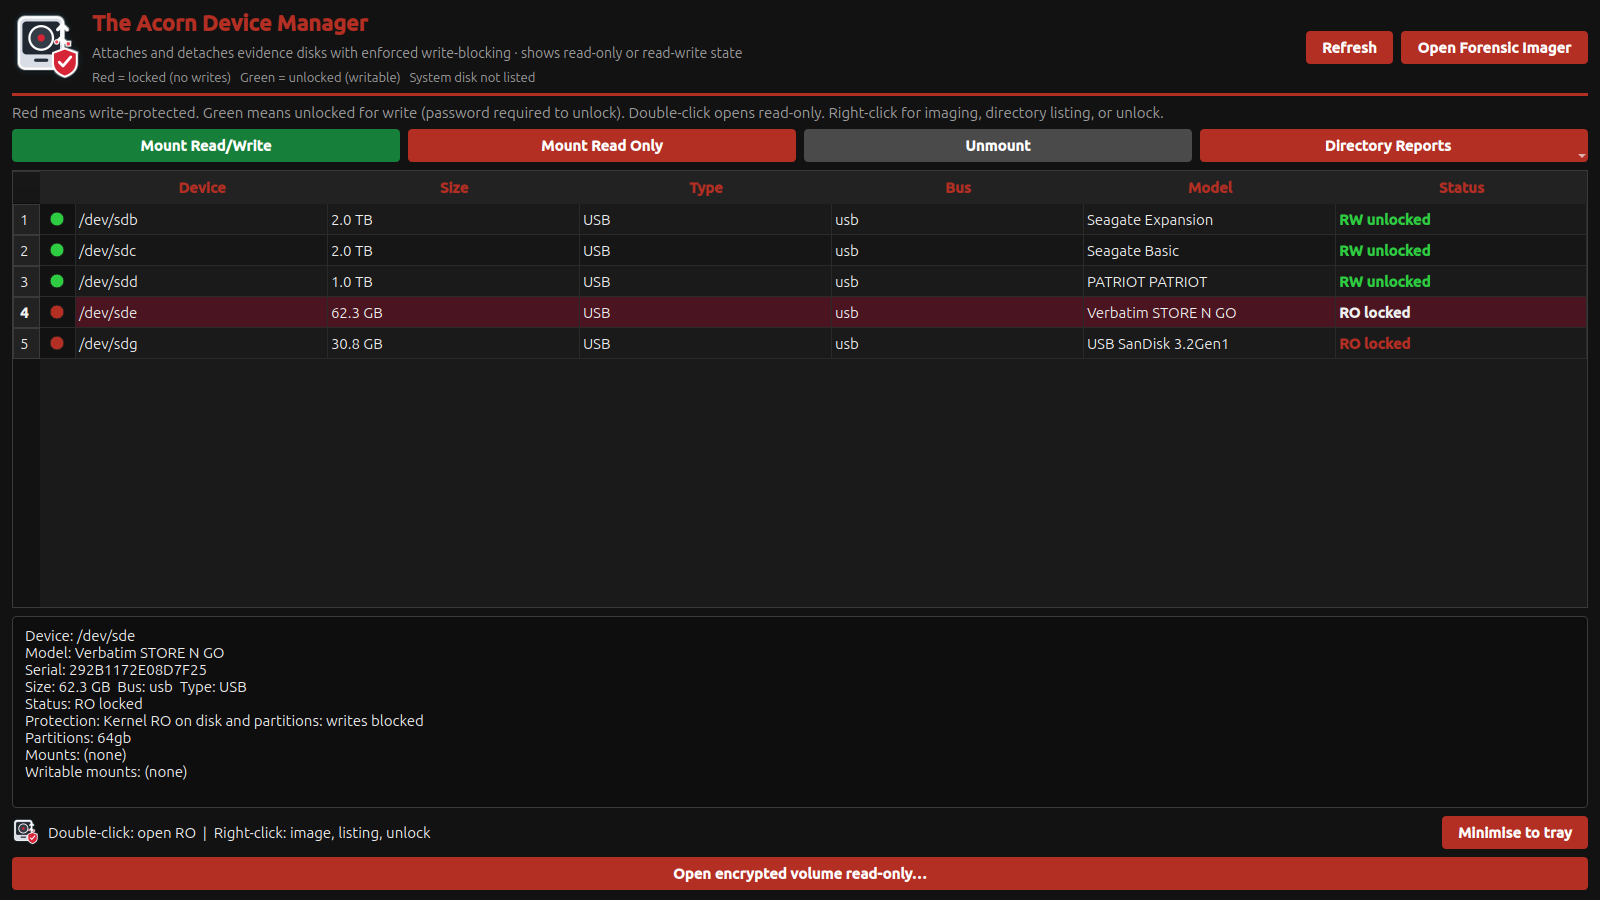
Several attached disks can have similar capacities, labels or partition layouts. Compare the reported model, serial number, size and connection with the exhibit record. A volume label such as BACKUP is not a unique identifier.
Keep an inventory of source devices and output storage. If a bridge changes or hides an identifier, record that fact and use the remaining evidence to establish identity. Do not assume that the first external drive shown is the source.
 View full size
Choose an action at the correct layer
A physical disk, a partition, an image file and a mounted file system are different objects. Whole-device acquisition and a targeted export answer different requirements. Choose the layer that matches the instruction before starting the job.
Device Manager links the device view to imaging and supported review tools. Check read-only state for the evidence source and keep the case destination writable. When mounting an encrypted volume, also record the relationship between the source and its unlocked view.
Handle changes deliberately
After reconnecting hardware, refresh the device view and recheck identity and protection. Linux device names can change. A previously correct selection should not be treated as permanently correct after the connection changes.
A practical evaluation uses at least two similar test disks and a separate destination. Ask the examiner to identify each one, protect the source and start the intended workflow. Clear decisions under these ordinary conditions are a useful measure of the interface.
What to check
- Identity checked against the exhibit record
- Disk, partition, image and mount roles understood
- Protection and destination rechecked after reconnection
Common questions
Can a volume label identify an exhibit on its own?
No. Labels can be duplicated or changed. Use the available hardware identifiers and the collection record together.
Does browsing a mounted volume equal a physical acquisition?
No. Browsing accesses the mounted file-system view. A physical acquisition preserves the selected device’s addressed data through the chosen imaging method.
Explore the relevant Acorn apps
Put the workflow to the test
Walk through evidence-device management with SQFR
Tell SQFR about the source types, task and equipment you need. We can discuss a focused demonstration and the configuration or quotation that fits. Do not send case evidence or credentials through the enquiry form.